In this tutorial you’ll learn how to enable ssh on Raspberry Pi 4, with the Raspberry Pi OS (previously Raspbian).
On Raspberry Pi OS, ssh is disabled by default, so you’ll have to find a way to enable ssh + find the IP address + connect to it.
I will separate the tutorial into 2 parts:
- Enable ssh if you’re using your Pi with a monitor and keyboard.
- Enable ssh if you’re using your Pi headless.
I’ll also give you some extra configuration steps so everything will run smoothly later on when you work on your Pi via ssh.
Using ssh (“Secure Shell”) is one of the best way to work with your Raspberry Pi board(s). It will allow you to work on your Pi remotely, and you can also easily work on multiple boards at the same time from only one computer.
Table of Contents
First – Flash Raspberry Pi OS (Raspbian) into your micro SD card
Before we start, make sure you’ve flashed the Raspberry Pi OS into a micro SD card (class 10, at least 8GB). If you already did that, go to the next step.
You are learning how to use Raspberry Pi to build your own projects?
Check out Raspberry Pi For Beginners and learn step by step.
You can also the Raspberry Pi Imager directly, which will download and flash the image all at once.
Alright, now let’s enable ssh on the Pi.
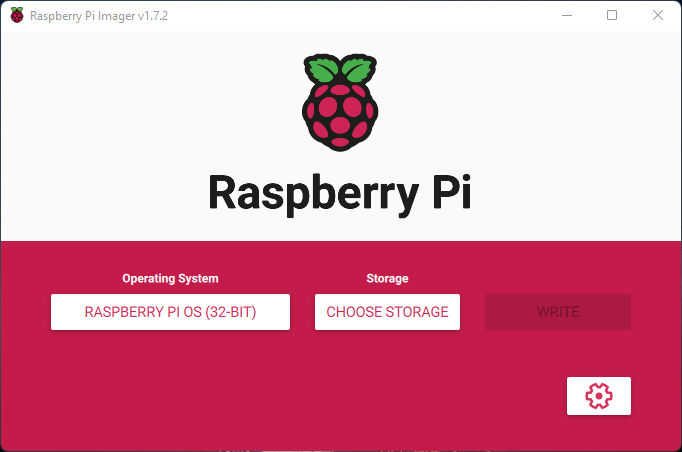
New feature: Enable SSH directly when you flash the SD card
This is quite convenient: you can directly enable SSH before writing the operating system into the SD card. Note that this only works if you’re starting from scratch, not if you’ve already flashed the OS. In the latter case, skip this part of the tutorial. If you’re starting from scratch, let’s start!
So, before writing the operating system on the SD card, click on the “settings” icon.

Click on “Enable SSH”, and set a username + password. You will need to remember this username/password for when you will connect to the Raspberry Pi via SSH.
Also, scroll down a bit and enable Wi-Fi. Make the Raspberry Pi board connect to the same Wi-Fi network as your laptop/computer.
Then, save and click on “write”.
Now that you’ve done this step, you can go directly to the “Find the Raspberry Pi’s IP address” part below (either with a monitor/keyboard, or without). You have enable SSH but you still need to find the IP address to be able to connect to the Raspberry Pi.
Enable ssh on Raspberry Pi 4 with a monitor and keyboard
So, you already have a working operating system on the SD card and don’t want to flash it again?
Let’s first see how you can enable ssh on your Raspberry Pi 4, when using an external monitor + keyboard + mouse.
>> Video version:
Initialization
If this is the first time you boot your Pi with your new image, then follow the steps of the “Welcome” screen. You will:
- Select a country, language, keyboard layout, timezone.
- Connect to a Wi-Fi network.
- Change the default password (user: “pi”, password: “raspberry”).
- Update packages to their newest version.
The important thing you need for the following is that the Raspberry Pi 4 (ssh server) is connected to the same Wi-Fi network as your computer (ssh client).
Enable ssh from the Raspberry Pi 4
First, open a new terminal.
Execute sudo raspi-config.
You will see this menu (or something very similar).
Select “Interfacing Options” and press ENTER.
Then, select “SSH” and press ENTER.
Select “Yes”, press ENTER, and you’ll get a message “The SSH server is enabled”.
Then, you’ll see the raspi-config menu again, press ESCAPE to quit.
That’s it!
Find the Raspberry Pi’s IP address
To connect to the Pi from your computer, you’ll need to know the IP address of the Pi.
Well, as you’re already working from the Pi, that’s really easy.
Simply open a terminal and run hostname -I. This will give you the IP address of the Pi inside the Wi-Fi network it’s connected to.
$ hostname -I
192.168.43.56
Here in my case: 192.168.43.56. Of course you will certainly have a different value.
>> Video version:
Connect to the Pi via ssh
If you’re using Linux, Mac OS, or Windows 10 (with at least the October 2018 update), you can simply use a ssh client from a terminal. If you’re using a previous version of Windows, you can download and use the Putty software.
So, open a new terminal on your computer. In Windows 10, search for “cmd” or “terminal” in the search bar.
Then, to be able to create a successful connection, you need 3 things:
- the IP address of the Pi: well that’s just what we got from the last step.
- username: this is the username you have on your Pi. The default one with Raspbian is “pi”. (on your Pi, execute
whoamito check the username) - password: by default this is “raspberry”, but you should already have changed it in a previous step.
To create a ssh client and thus connect to the Raspberry Pi 4, execute: ssh username@ip_address, and then provide the password.
you@your-computer:~$ ssh pi@192.168.43.56
pi@192.168.43.56's password:
Linux raspberrypi 4.19.118-v7l+ #1311 SMP Mon Apr 27 14:26:42 BST 2020 armv7l

The programs included with the Debian GNU/Linux system are free software;
the exact distribution terms for each program are described in the
individual files in /usr/share/doc/*/copyright.

Debian GNU/Linux comes with ABSOLUTELY NO WARRANTY, to the extent
permitted by applicable law.
Last login: Fri Jun 26 10:21:38 2020 from 192.168.43.138
pi@raspberrypi:~ $
Great, you’re now connected to the Pi with ssh! Working in this terminal (session) is the same as if you work directly on the Pi (with a monitor + keyboard).
Enable ssh on Raspberry Pi 4 without any monitor
Here comes a greater challenge: what if you don’t have an extra monitor + keyboard to first enable ssh on your Raspberry Pi 4? Or… What if you’re just too lazy to setup all the hardware? (I know I am)
Well, you can enable ssh on your Pi without any monitor, and it’s not that hard. Let’s get started.
(note: if you’re willing to flash the SD card again – and loose all data – you can go back in the tutorial and learn how to enable SSH + Wi-Fi directly on the SD card. If not, read on.)
>> Video version:
Make the Pi automatically connect to Wi-Fi
You may directly plug an Ethernet cable between your computer and your Pi, so they’re both already in the same network, but let’s say that we’re not going to use an Ethernet cable here.
So, before we can even think of ssh, we first need to make sure the Pi can connect to the Wi-Fi network.
Put your micro SD card back into your computer, and navigate into its root folder (named “boot”).
Here create a file named “wpa_supplicant.conf” (remove any other extension like “.txt”).
Open this file with any text editor (on Windows -> right click + “Open with”), and write the following:
country=US # replace with your country code
ctrl_interface=DIR=/var/run/wpa_supplicant GROUP=netdev
network={
    ssid="WIFI_NETWORK_NAME"
    psk="WIFI_PASSWORD"
    key_mgmt=WPA-PSK
}
Replace WIFI_NETWORK_NAME and WIFI_PASSWORD with the actual name and password of your Wi-Fi network.
Save and quit the file.
Great, now the Pi should automatically connect to the Wi-Fi network on boot. But, before you remove the SD card, let’s configure ssh.
Enable ssh directly on the SD card
Here it’s really simple. Still in the root folder of your SD card (“boot”) create a new file named “ssh”, with no extension.
That’s it! This will enable ssh when you boot the Pi.
Now, remove the micro SD card from your computer, make sure the Pi is powered off, put the SD card into the Pi, and power it on.
Find the Raspberry Pi’s IP address
As you don’t have a direct access to your Pi, you’ll need to find its IP address from your computer.
On Windows, you can download and install Advanced IP Scanner. Open the software and press “Scan”.
Here you can see, we have a machine named “raspberrypi” on the network, and we also have its IP address!
>> Watch this for a complete tutorial on how to use Advanced IP Scanner:
Alternative: if you want a software with a graphical interface that runs on both Windows, Linux, and MacOS, use Angry IP Scanner.
If you’re on Linux, you can use the nmap tool (sudo apt install nmap).
Let’s say the IP address of your computer is 192.168.43.138, then you can execute:
$ sudo nmap -sP 192.168.43.0/24
[sudo] password for ed:
Starting Nmap 7.80 ( https://nmap.org ) at 2020-06-26 11:13 CEST
Nmap scan report for _gateway (192.168.43.1)
Host is up (0.014s latency).
MAC Address: 8E:F5:A3:DB:03:27 (Unknown)
Nmap scan report for raspberrypi (192.168.43.56)
Host is up (0.032s latency).
MAC Address: DC:A6:32:02:46:50 (Raspberry Pi Trading)
Nmap scan report for LAPTOP-27UBLNO7 (192.168.43.234)
Host is up (0.00035s latency).
MAC Address: 7C:B2:7D:9E:95:DA (Intel Corporate)
Nmap scan report for ed-vm (192.168.43.138)
Host is up.
Nmap done: 256 IP addresses (4 hosts up) scanned in 2.26 seconds
And you also find the IP address of the Pi.
>> Watch this for a video explanation on how to use nmap:
Connect to the Raspberry Pi 4 via ssh
Well, now it’s the same as before (when we setup ssh with a monitor). From your computer, open a terminal and execute ssh username@ip_address.
Here the username is “pi”, and the password is “raspberry” since we haven’t changed it yet.
you-your-computer$ ssh pi@192.168.43.56
pi@192.168.43.56's password:
Linux raspberrypi 4.19.118-v7l+ #1311 SMP Mon Apr 27 14:26:42 BST 2020 armv7l

The programs included with the Debian GNU/Linux system are free software;
the exact distribution terms for each program are described in the
individual files in /usr/share/doc/*/copyright.

Debian GNU/Linux comes with ABSOLUTELY NO WARRANTY, to the extent
permitted by applicable law.
Last login: Fri Jun 26 07:40:00 2020
-bash: warning: setlocale: LC_ALL: cannot change locale (en_US.UTF-8)

SSH is enabled and the default password for the 'pi' user has not been changed.
This is a security risk - please login as the 'pi' user and type 'passwd' to set a new password.
Great, you’re in!
If you see this line -bash: warning: setlocale: LC_ALL: cannot change locale (en_US.UTF-8), there is a problem with the locale setup, and you can fix it by executing those commands:
$ sudo sed -i "s/# en_US.UTF-8 UTF-8/en_US.UTF-8 UTF-8/g" -i /etc/locale.gen
$ sudo locale-gen en_US.UTF-8
$ sudo update-locale en_US.UTF-8
Also, as you can see in the logs, now might be a good time to change the password with passwd.
pi@raspberrypi:~ $ passwd
Changing password for pi.
Current password:
New password:
Retype new password:
passwd: password updated successfully
And also update/upgrade your packages:
$ sudo apt update
...
$ sudo apt upgrade
...
$ sudo apt autoremove
...
Your Raspberry Pi 4 is now configured and you can continue to work on it via ssh!
Conclusion
In this tutorial you’ve seen how to enable ssh on Raspberry Pi 4, using the Raspberry Pi OS (previously Raspbian).
Sometimes you will want to work with a monitor, sometimes not. And that gives you 2 ways of setting things up. At the end, once your Pi is connected to the Wi-Fi network, and ssh is enabled, well it is the same whether you use a monitor or not.
From your computer, you’ll simply open a terminal (from Windows 10/Linux/MacOS), and you’ll ssh into the Pi. You can create multiple clients to open multiple sessions on the Pi.
This tutorial was for Raspberry Pi OS (Raspbian), but maybe you’ll also want to try to install Ubuntu on your Pi: here is how to setup ssh when using Ubuntu.