In this tutorial I’ll show you how to install ROS Noetic on your Raspberry Pi 4 (also works with 3B or 3B+), with Ubuntu Server 20.04.
Table of Contents
Why ROS on Raspberry Pi
A Raspberry Pi board is perfect for being embedded in a robot:
- It’s small – credit card size, and already has mounting holes.
- It’s powerful enough to run some serious programs.
- It has a 40 GPIOs header to manipulate some hardware components.
- It’s connected with out-of-the-box Wi-Fi and Bluetooth.
- It’s compatible with Ubuntu
- And – the icing on the cake – you can install ROS on it.
With ROS and all the features listed above, you will be able to program complete robots with a 40$ embedded board. Not bad, huh?
Which Operating System for ROS on Raspberry Pi?
The default operating system for Raspberry Pi is Raspberry Pi OS, which is itself created from Debian.
Unfortunately ROS is not supported (yet?) on Debian. For now you can only use Ubuntu OS.
Also, do you need a desktop environment? Probably not, so you can install Ubuntu Server instead of Ubuntu Desktop, which will save some space and use less resources.
You are learning ROS?
Check out ROS For Beginners and learn ROS step by step.
Here is how to install Ubuntu Server on your Raspberry Pi. You’ll have to make sure to choose Ubuntu Server 20.04 in the Raspberry Pi Imager, and not 22.04 (ROS Noetic is only supported in Ubuntu 20.04).
Once you have installed Ubuntu on your Raspberry Pi, you’re ready for the next step.
Install ROS on your Raspberry Pi
To install ROS you’ll only need a terminal. Open a terminal either on the Ubuntu desktop, or via ssh (recommended).
You can find the complete reference to install ROS on the ROS Wiki. Here I’ll show you exactly what commands and packages you need to get started (not every step and package is needed).
Configure Ubuntu repositories
You need to allow restricted, universe, and multiverse repositories.
If you want to use the Ubuntu Desktop, open “System Settings…” > “Software & Updates” > “Ubuntu Software”. Click on the 3 check-boxes for universe, restricted and multiverse.
You can also directly execute those commands in a terminal if you don’t want to use the graphical interface:
$ sudo add-apt-repository universe
$ sudo add-apt-repository restricted
$ sudo add-apt-repository multiverse
Setup sources
Execute those 3 commands in the terminal:
$ sudo sh -c 'echo "deb http://packages.ros.org/ros/ubuntu $(lsb_release -sc) main" > /etc/apt/sources.list.d/ros-latest.list'
$ sudo apt install curl # if you haven't already installed curl
$ curl -s https://raw.githubusercontent.com/ros/rosdistro/master/ros.asc | sudo apt-key add -
Now, update the sources to find new packages:
$ sudo apt update
Install ROS core packages
On the Wiki installation guide you are now given a list of choices for which ROS packages to install first.
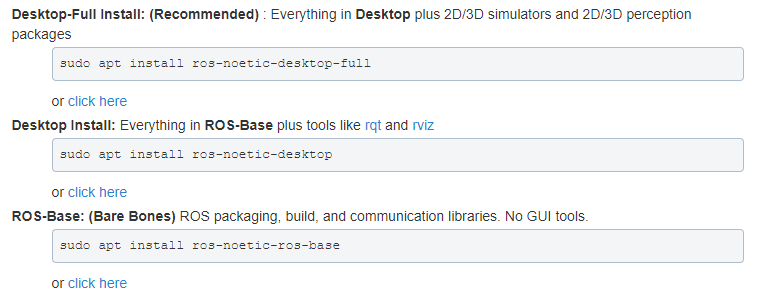
Usually, on a desktop computer or laptop you’d have chosen Desktop-Full Install. Here, don’t do that! Even if the Raspberry Pi can handle ROS, keep in mind that the resources are still quite limited, and installing the full version of ROS with 3D simulation tools will be too much.
Here you will install only the base (core packages with communication), and then as you progress with ROS you will install the packages you need – as you go. This is the method I recommend.
Plus, as you’ll certainly use your Pi headless – because it’s usually embedded in a robot, you won’t need the simulation tools. You can install those tools on your own computer, and only keep the minimum required on the Pi.
So, install ros-noetic-ros-base on your Pi.
$ sudo apt install ros-noetic-ros-base
The installation will be quite long. Several hundreds packages will be installed.
You now have the ROS core base installed on your Raspberry Pi. This is enough to create nodes using topics and services. All the build tools are also available.
If you want to install an additional ROS package, simply use sudo apt install ros-noetic-PACKAGE_NAME
For example, we’ll install the Robot State Publisher package. This one is very useful to publish the state of your robot using joint states.
$ sudo apt install ros-noetic-robot-state-publisher
Setup rosdep
A final step before the installation is complete:
$ sudo apt install python3-rosdep
$ sudo rosdep init
$ rosdep update
Start with ROS on your Raspberry Pi
Setup your environment and start roscore
Before you can start using ROS, you need to setup your environment. Don’t worry though, it only takes one command!
Simply execute:
$ source /opt/ros/noetic/setup.bash
You can now start a ROS master with the command roscore:
$ roscore
... logging to /home/ed/.ros/log/fb9ac906-9320-11e9-9444-b827eba68e23/roslaunch-ed-desktop-2967.log
Checking log directory for disk usage. This may take awhile.
Press Ctrl-C to interrupt
Done checking log file disk usage. Usage is <1GB.

started roslaunch server http://ed-desktop:40871/
ros_comm version 1.14.3


SUMMARY
========

PARAMETERS
 * /rosdistro: noetic
 * /rosversion: 1.14.3

NODES

auto-starting new master
process[master]: started with pid [2978]
ROS_MASTER_URI=http://ed-desktop:11311/

setting /run_id to fb9ac906-9320-11e9-9444-b827eba68e23
process[rosout-1]: started with pid [2989]
started core service [/rosout]
Here’s what happens if you try to start roscore without your environment correctly setup:
$ roscore

Command 'roscore' not found, but can be installed with:

sudo apt install python-roslaunch
You’ll get this error message. Note that it doesn’t have anything to do with the python-roslaunch package, it’s just about your environment.
You’ll need to run source /opt/ros/noetic/setup.bash every time you want to use ROS in a new terminal (= new session). That’s why it’s best if you directly add this line to your .bashrc, so you don’t need to think about it anymore. Your .bashrc is executed as soon as you create a new session.
$ echo "source /opt/ros/noetic/setup.bash" >> ~/.bashrc
Well, that’s pretty much it! With this you’re ready to develop with ROS on your Raspberry Pi board.
Start developing!
To start developing with ROS you’ll need to create a catkin workspace – just as you would do on your own computer.
$ mkdir -p ~/catkin_ws/src
$ cd ~/catkin_ws
$ catkin_make
You’ll see a new devel/ and build/ folders in your catkin workspace.
You also need to source (in addition to the global ROS installation) the newly created setup.bash script so you can use this catkin workspace in your environment.
$ echo "source ~/catkin_ws/devel/setup.bash" >> ~/.bashrc
After that, if you’ve already developed with ROS on another computer/environment, well it’s the exact same thing! The way to create packages, compile code, use the command line tools is the same.
On your Pi you’ll be able to install libraries to communicate directly with hardware components, through the GPIO panel (RPi.GPIO, WiringPi, etc). Including those libraries in your ROS code is quite easy. One thing you’ll have to pay attention to: if you plan on using the same code on a Raspberry Pi and a computer, separate the hardware-specific code and only launch it on the Raspberry Pi.
Limitations for ROS on Raspberry Pi
Developing with ROS on a Raspberry Pi is not the same thing as developing on a new high-performance laptop.
- Depending on your Raspberry Pi 4 config, you can have a limited amount of RAM (1, 2, 4, 8 GB). Every time you run a new node or launch file it takes more RAM. Thus you’ll have to limit the number of nodes you have in your application if you have the 1GB version. For example, if you have multiple identical sensors, try to manage them all in one node, instead of creating an anonymous node for each sensor.
- The Pi processor architecture is ARM, not x86 like on almost all “normal” computers. When you install an additional ROS package you might find that some dependencies are failing, simply because the package was developed (and hopefully tested) only on x86, and no test was done on ARM.
- Don’t install and use the 3D simulation tools. First, those may not work because of some failing dependencies. And then, the Pi resources are not adapted to graphical applications. If you want to use Rviz with your application, I suggest you setup a multi-machine environment (your Pi + your computer) and install the 3D tools on your computer.
- The Raspberry Pi may have a hard time compiling big Cpp nodes with the
catkin_makecommand. By default catkin_make takes all available cores to compile – 4 for the Pi. When compiling, if you get this error: “c++: internal compiler error: killed (program cc1plus)”, this is probably because the compilation failed due to the Pi resources. In this case, prefer usingcatkin_make -j2, so the compilation only uses 2 cores out of 4. With this tip I’ve never had the error above anymore.
Make sure you check those best practices on ROS and Raspberry Pi.
What to do next
Well, you’ve now got Ubuntu 20.04 and ROS Noetic installed on your Raspberry Pi 4!
If you are not familiar with ROS yet, check out what is ROS, and start learning step by step.
Then, start to develop a real robot with your Raspberry Pi. For example you can embed your Pi in a mobile robot, a robotic arm, even a drone.
Check out the following practical tutorials to start writing ROS programs on your Pi:
